INFEED TRAINING
Grading Timber & Common Defects
Introduction
In this lesson, you will learn how to properly grade timber and identify common defects. Proper grading ensures that only high-quality timber is used in production, maintaining the standards for the final products
Importance of Grading Timber
Grading timber is essential for maintaining the quality of the final products. By identifying and removing defective pieces early in the process, you ensure that the timber used meets the required standards for strength, durability, and appearance.
Timber Grading Process
Each piece of feedstock must adhere to the specifications for that type or species. The specs can be found in Appendix E – Laminate Specifications For All Products, and on the quality boards located on the wall near the RF. If you find any pieces of timber with defects in them, remove/dock the defect or throw the piece out. This page will outline some of the most common defects found in the timber on site.
Inspect
- Visually inspect each board as it moves through the grading area.
- Look for defects and mark them with lumber crayon. Use different markings for different types of defects.

Marking Defects
- Single Line: Draw a single line across the board to indicate where it should be cut to remove a defect. Allow 15mm extra for errors.
- Double Line: Draw two lines less than 20mm apart to indicate that all timber after this point should be cut into 150mm waste pieces until the next crayon line or the end of the board.

Using the Scanner
- The marked boards proceed through a scanner that identifies docking required.
- Defects are automatically docked out by the docking saw based on the scanner’s readings.

Lumber Crayons
Take care with the crayon as a single dot can be picked up by the scanner causing an unwanted docking.
Grading Station Operation
- Ensure the green light is flashing to allow the board to feed. If it is not flashing, Zone B is not ready.
- To run the grading station in auto, press ‘RUNNING SETUP’ -> ‘OK’ -> tick the box ‘AUTO OUTFEED’.
Safety Considerations
Wear gloves when handling timber. Beware of pinch points as the board comes off the hold back arms to be graded. Keep your hands out of the area below the drop-down arms – use a push stick to adjust stuck boards or isolate then correct the issue.
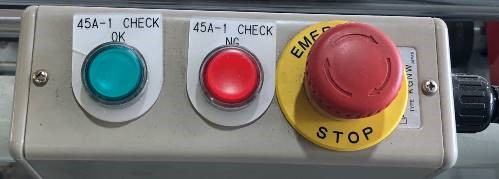
* Note *
If you need more than the 2 seconds allowed to grade both sides of a board in auto mode, press the red ‘NG’ button on 1 of the 3 controls along the grading station to pause auto mode. Press the green ‘OK’ button to restart auto mode, dropping the board down to the scanner and docking saw.
Common Timber Defects
Understanding and identifying common timber defects is crucial for maintaining the quality of the final products. Below is a detailed explanation of the most common defects you will encounter during the grading process.
Want and Wane
Definition:
- Want refers to a lack of wood along the edge or face of the board, usually caused by the timber being cut too close to the edge of the log.
- Wane is the presence of bark or the curved outer edge of the log on the edge or face of the board.
Acceptable Limits:
-
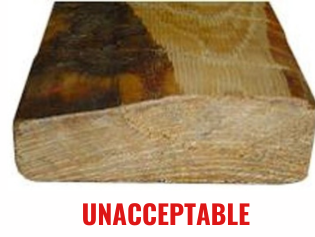
- Face: Wane should be less than 10mm wide. This means that the presence of wane on the surface of the timber is minimal and does not significantly affect the strength or appearance of the board.
- Edge: Wane should be less than 10mm deep. This ensures that the structural integrity of the timber is not compromised.

Unacceptable Limits:
-
- Face: Wane greater than 20mm wide is unacceptable. Such significant wane can weaken the board and affect its appearance.
- Edge: Wane greater than 10mm deep is unacceptable, as it compromises the strength and usability of the timber.
Knots
Definition:
Knots are imperfections caused by branches growing out of the tree trunk. Knots are areas where the grain direction has changed, and they can affect the strength and appearance of the wood.
Acceptable Limits:
-
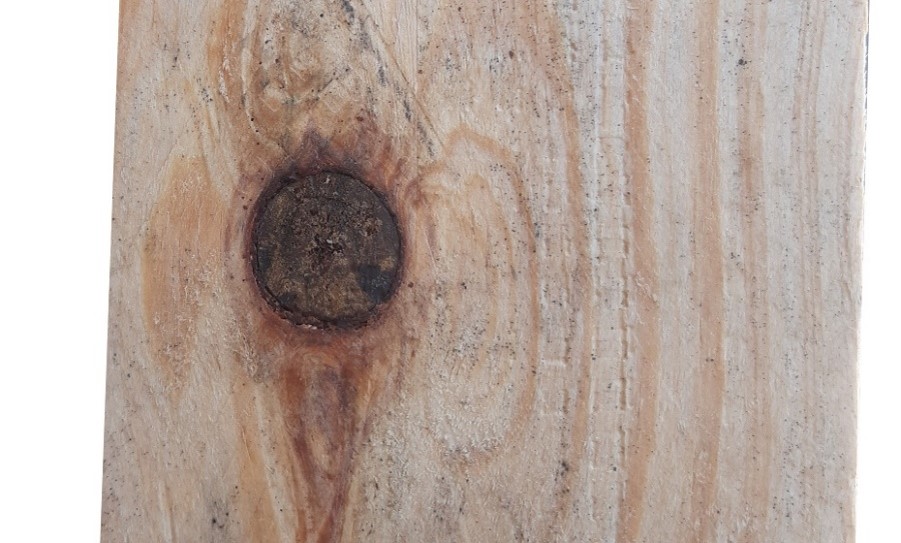
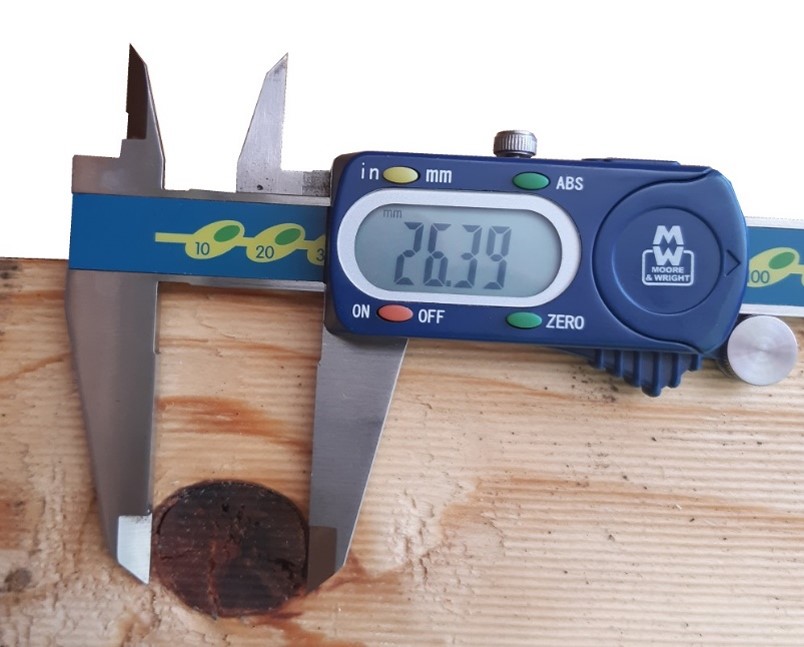
- Outers: Knots must be less than 15mm wide. This ensures that the knots are small enough not to significantly weaken the timber.
- Inners: Knots can be up to 30mm wide. Since inners are not visible on the final product, they can accommodate slightly larger knots without affecting the overall quality.
Unacceptable Limits:
-
- Outers: Knots exceeding 15mm in width are unacceptable. Larger knots can weaken the board and detract from its appearance.
- Inners: Knots exceeding 30mm in width are unacceptable. While inners can tolerate larger knots, those that exceed 30mm compromise the board’s strength.
- Loose Knots or Voids: Any loose knots or voids are unacceptable, as they create weak spots in the timber that can lead to breakage.
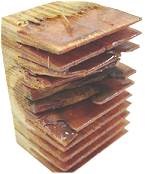
Knots in the Finger Joints
- No knots allowed within the finger joint zone (the area where the fingers will be cut)
- Knots larger than 25mm are not permitted within 50mm of the fingers.
Acceptable
Unacceptable
Unacceptable
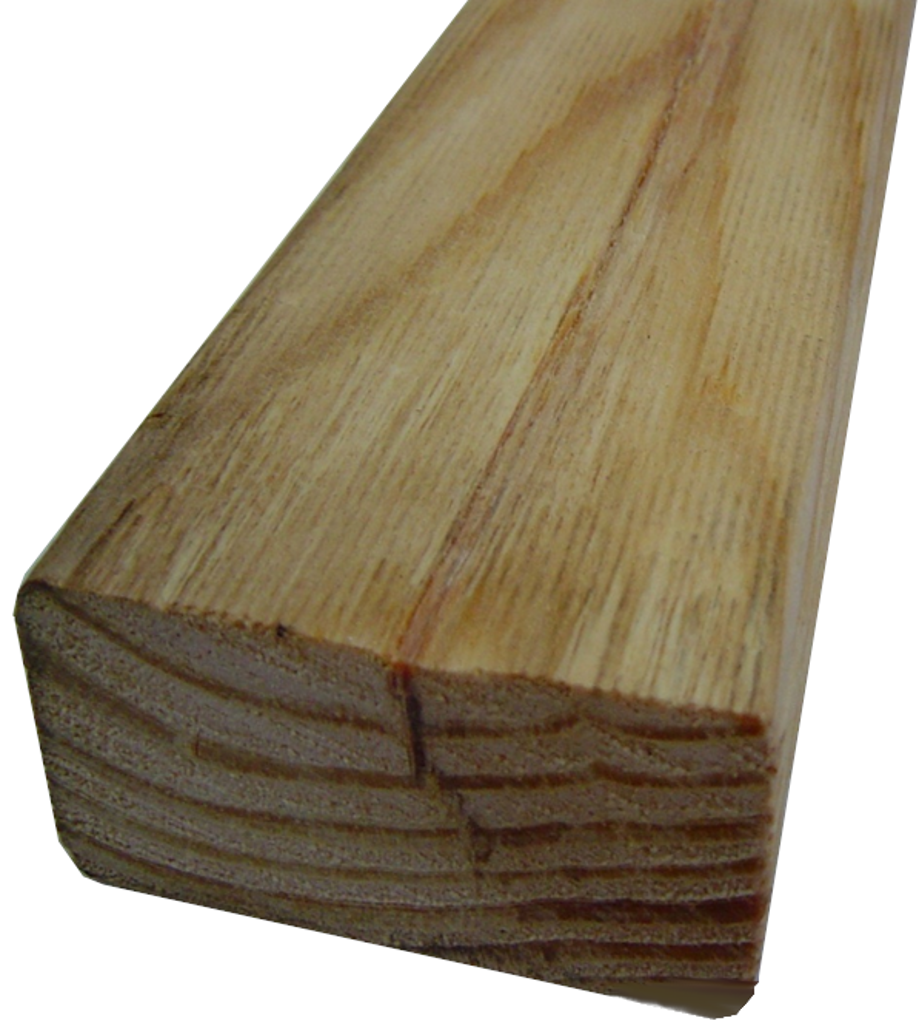
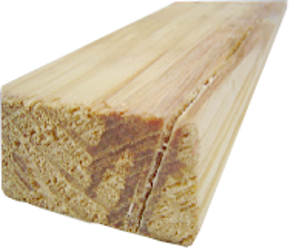
Resin Pockets and Splits
- Definition:
- Resin Pockets are areas within the wood where resin has accumulated. These pockets can create weak points in the board.
- Splits are cracks in the wood that run along the grain. They occur when the wood fibers are pulled apart, often during the drying process.
- Acceptable Limits:
- Resin pockets and splits must be a maximum of 150mm long and 12mm wide, with no open splits. This ensures that the defects are small enough not to affect the structural integrity of the board.
- Unacceptable Limits:
- Resin pockets or splits that are greater than 150mm long and/or 12mm wide with open splits are unacceptable. Larger or open defects significantly weaken the board and can lead to failure during use
Acceptable
Unacceptable
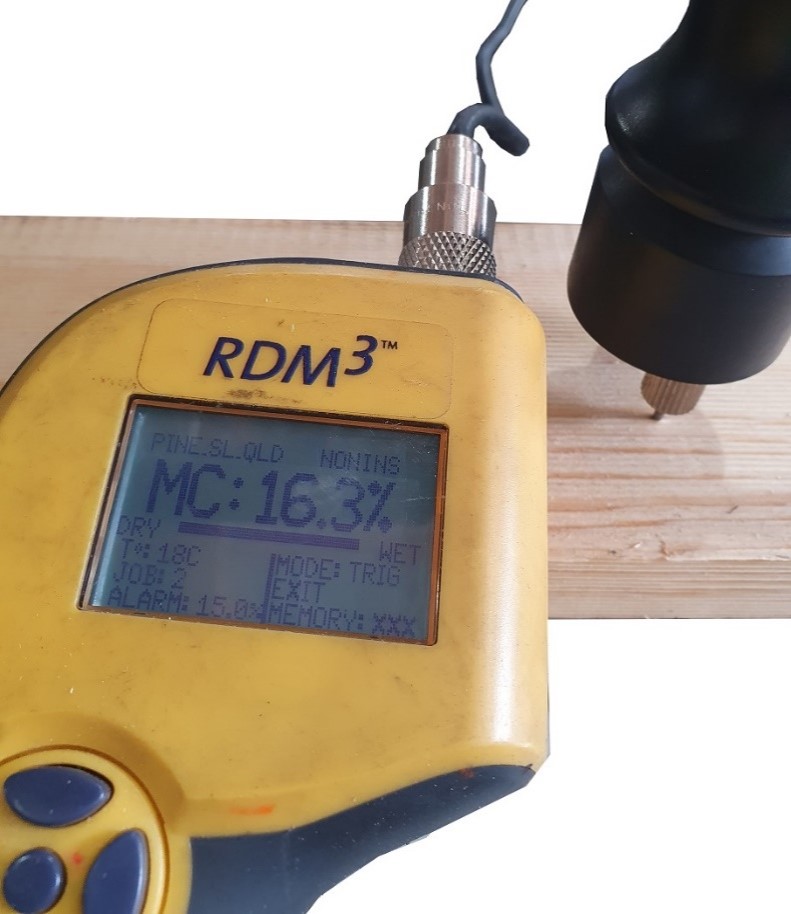
Moisture Levels
- Definition:
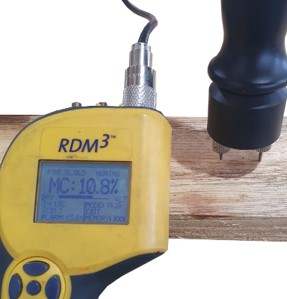
- Moisture Content refers to the amount of water present in the wood. The moisture level affects the wood’s strength, stability, and suitability for processing.
- Acceptable Limits:
- Moisture content should be between 8% and 14%. This range ensures that the timber is stable and suitable for use without excessive shrinkage, warping, or swelling.
- Prongs (wood grain alignment) must be lined up along the grain of the timber to ensure proper structural integrity.
- Unacceptable Limits:
- Moisture content below 8% or above 14% is unacceptable. Timber that is too dry may become brittle, while timber that is too wet may shrink or warp as it dries.
- Prongs lined up across the grain of the timber are unacceptable, as this weakens the structural integrity of the board.
- If the moisture content is outside the acceptable range, consult your supervisor for further instructions.
Acceptable
Unacceptable
Twist, Bow & Spring
- Definitions:
- Twist: A spiral distortion along the length of the timber, where the ends of the board are no longer in the same plane.
- Spring: A distortion along the length of the thinner edge, where the board bends inwards or outwards.
- Bow: A distortion along the length of the wider face, causing the board to curve.
- Limits and Tolerances:
- The acceptable limits for twist, spring, and bow depend on the specific pack size and grade. Refer to MGL Appendix E1 – Feedstock Specifications (100 x 25 Wingboard) for exact limits.
- Excessive twist, spring, or bow can render the timber unsuitable for use, as it can lead to difficulties in processing and reduce the structural integrity of the final product.
Handling Defective Timber
-
Rejecting Timber:
- If a pack of timber contains pieces that fail to meet the grading standards, mark it as “REJECT – SIZE” and return it to the storage yard.
- For wet timber, spray paint “WET” and the date on the pack and return it to the yard for drying.
-
Size Checks:
- Use a steel ruler to measure the first 5 pieces from a pack and another 5 random pieces.
- Ensure each piece falls within the specified tolerances found in Appendix E – Laminate Specifications For All Products.
Quick Quiz
-
What is the purpose of grading timber?
- A) To increase the weight of the timber
- B) To ensure only high-quality timber is used in production
- C) To speed up the production process
-
How should you mark a defect that requires the board to be cut into 150mm waste pieces?
- A) Draw a single line across the board
- B) Draw two lines less than 20mm apart
- C) Draw a circle around the defect
-
What is the acceptable limit for want and wane on a board?
- A) Less than 50% of the width of each face and less than 900mm long
- B) Less than 25% of the width of each face and less than 900mm long
- C) Less than 30% of the width of each face and less than 1000mm long
-
What should you do with a pack of timber that is too wet?
- A) Use it immediately
- B) Mark it as “WET” and return it to the yard for drying
- C) Discard it
-
How many pieces of timber should you measure for size checks from a pack?
- A) 5 pieces
- B) 10 pieces
- C) 15 pieces
Answers
- B) To ensure only high-quality timber is used in production
- B) Draw two lines less than 20mm apart
- B) Less than 25% of the width of each face and less than 900mm long
- B) Mark it as “WET” and return it to the yard for drying
- B) 10 pieces
By following these guidelines for grading timber and identifying common defects, you can ensure that only the best quality timber is used in the production process. This helps maintain high standards for the final products. Let’s move on to the next lesson to learn about maintenance and troubleshooting.

Twist

Spring

