ROTARY PRESS TRAINING
Pre-operational Checks
Course Menu
- Back to Main Menu
- Lesson 1 – Introduction
- Lesson 2 – Safety Procedures
- Lesson 3 – Pre-Operational Checks
- Lesson 4 – Operating Instructions
- Lesson 5 – Glue Test
- Lesson 6 – Size Change
- Lesson 7 – Troubleshooting
- Lesson 8 – When Down,Do
- Lesson 9 – End of Shift Procedures
- Lesson 10 – Competency Quiz
- Lesson 11 – Trainer Verification
Introduction
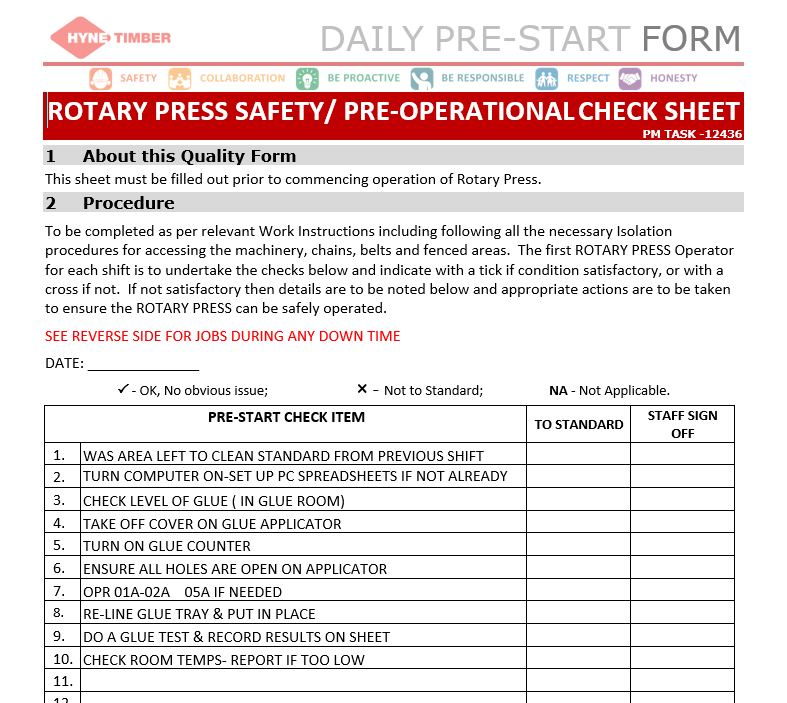
Before starting the Rotary Press, it’s essential to complete all necessary pre-operational checks to ensure safe and efficient operation. Follow this checklist to prepare the press for a productive shift. As you complete each task, please tick the corresponding box and sign off on the Pre-Operational Checklist document to confirm that the task has been completed. Any issues encountered during the checks should be reported immediately to your supervisor and/or the maintenance team.

Cleanliness Check:
-
- Task: Verify that the work area was left clean by the previous shift.
- Description: Inspect the press area for any debris, glue spills, and unnecessary materials. A clean workspace is crucial for maintaining safety and efficiency.


Computer Setup:
- Task: Turn on the computer and set up the necessary PC spreadsheets.
- Description: Power up the computer and open the required spreadsheets to log data during the shift. Ensure that all relevant programs are ready for use.


Glue Level Check:
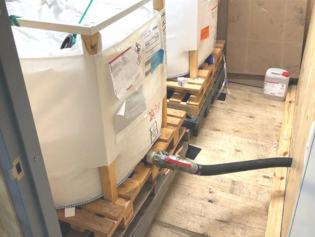
- Task: Check the level of glue in the Glue Room.
- Description: Inspect the glue tank to ensure it has sufficient adhesive for the shift. Top up the glue if needed, following standard procedures.


Glue Applicator Preparation
- Task: Remove the cover from the Glue Applicator.
- Description: Take off the protective cover from the glue applicator to prepare it for operation. This step ensures that the applicator is ready for use.

Glue Counter Activation
- Task: Turn on the Glue Counter via the HMI.
- Description: Access the HMI (Human-Machine Interface) and activate the glue counter. This step is necessary for tracking glue usage during production.


Applicator Nozzle Check
- Task: Ensure all holes on the applicator are open.
- Description: Inspect the glue applicator nozzles to confirm that all holes are clear and open. Blocked nozzles can lead to uneven glue application.

Press Software Check
- Task: Perform OPR checks for 01A, 02A, and 05A as needed.
- Description: Conduct OPR on the specified systems to ensure they are functioning correctly. Address any issues before starting the press.


Glue Tray Re-lining
- Task: Re-line the glue tray and put it back in place.
- Description: Replace the lining of the glue tray to ensure it is clean and ready for use. Properly position the tray in the applicator.


Glue Test
- Task: Perform a glue test and record the results on the sheet.
- Description: Conduct a glue test to verify the accuracy of the glue applicator. For detailed instructions, click here to view the glue test guide. Document the results to ensure the glue application meets production standards.

Room Temperature Check
- Task: Check the temperature in the Glue Room.
- Description: Verify that the Glue Room is maintaining the correct temperature. Report any deviations if the temperature is too low, as this can affect glue performance.

Well Done!
- After completing each task, please ensure that you tick the corresponding box and sign off on the Pre-Operational Checklist to confirm completion. If any issues arise during the checks, report them immediately to your supervisor or the maintenance team before proceeding.

