FINGER JOINER TRAINING
Size Change
Course Menu
- Back to Main Menu
- Lesson 1 – Introduction
- Lesson 2 – Safety Procedures
- Lesson 3 – Pre-Operational Checks
- Lesson 4 – Operating the Finger Joiner
- Lesson 5 – Operating the Laminate Press
- Lesson 6 – Monitoring the Laminate Deck
- Lesson 7 – Size Changes
- Lesson 8 – Quality Control
- Lesson 9 – When Down,Do
- Lesson 10 – Post-Operational Checks
- Lesson 11 – Competency Quiz
Introduction
Overview
In timber production, handling size changes efficiently is crucial for ensuring that different timber dimensions are processed correctly. At the Finger Jointer Workstation and Laminate Deck, changing the size of timber means adjusting several components of the machinery, including the cutter heads, press, and threading chains. Properly managing size changes ensures smooth operations and prevents product defects or machinery damage. This lesson will cover how to safely and effectively manage size changes, including isolating the equipment, adjusting machine settings, and performing test runs to ensure the changes are applied correctly.
By the end of this lesson, you will be able to:
- Safely isolate the machinery for size changes.
- Adjust width, height, and thickness settings on the Finger Jointer, Laminate Press, and Laminate Deck.
- Perform a test run to confirm the size changes have been applied correctly.
- Address common issues that may arise during size changes.
Step-by-Step Process for Size Changes
Step 1: Isolating the Equipment for Safety
Before making any adjustments to the machinery, it’s critical to follow proper isolation and lockout/tagout (LOTO) procedures. This ensures that the machinery is de-energized and safe to work on.
-
Lockout/Tagout (LOTO):
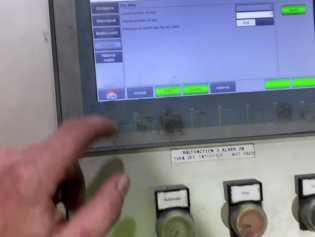
- Power down the Finger Jointer, Laminate Press, and Laminate Deck using the Human-Machine Interface (HMI).
- Apply your personal lock and tag to the power source of each machine to ensure that no one can accidentally power it on while adjustments are being made.
-
Verify Equipment is Safe:
- Once the machines are locked out, test the system to ensure there is no residual power. Visually confirm that all moving parts have come to a complete stop and that the safety guards are properly engaged.
Step 2: Adjusting the Finger Jointer for Size Changes
To accommodate different timber sizes, the Finger Jointer needs to be adjusted for width, height, and thickness.
-
Width Adjustment:
- Use the adjustment handles located on the threading chains to set the correct width for the new timber size. Ensure that both the FJ1 and FJ2 cutter heads are aligned to the appropriate width setting to maintain consistency in the cuts.
-
Height Adjustment:
- Adjust the height settings by using the black handles located on the machine. This ensures that the timber is properly positioned for both the cutting and gluing processes.
-
Thickness Adjustment:
- For thickness adjustments, check the infeed rollers and press feed rollers to make sure they are set to the correct thickness. Use the adjustment screws to modify the roller settings as needed.
Step 3: Adjusting the Laminate Press
After making changes to the Finger Jointer, the Laminate Press must also be adjusted to ensure proper pressing and bonding of the new timber size.
-
Width and Thickness Settings:
- Use the controls on the HMI to adjust the press width and pressing force. These settings should correspond to the new timber dimensions. Make sure the pressing force is appropriate for the thickness of the timber to avoid under- or over-pressing.
-
Threading Chain Adjustment:
- Adjust the width of the threading chains to accommodate the new size. This ensures the timber is fed into the press evenly without misalignment.
-
Glue Application:
- Ensure that the glue application settings are appropriate for the new timber dimensions. Glue should be applied evenly across the joints to maintain a strong bond.
Step 4: Adjusting the Laminate Deck
The Laminate Deck must be adjusted to ensure the laminated beams are placed correctly for drying and further processing.
-
Adjust Deck Width and Spacing:
- Use the deck controls to adjust the width and spacing of the laminate placement. Proper spacing ensures that the laminated beams have enough airflow around them for uniform drying.
-
Ensure Proper Alignment on Deck:
- After adjusting the width and spacing, check that the beams align properly on the deck. Misalignment can cause drying issues or defects in the final product.
Step 5: Performing a Test Run
Once all adjustments are made, it’s critical to perform a test run to ensure that the machinery is set correctly for the new timber size.
-
Run a Sample Piece:
- Use a sample piece of timber to test the new settings. Feed it through the Finger Jointer, Laminate Press, and onto the Laminate Deck to check for any alignment, cutting, or pressing issues.
-
Monitor for Issues:
- During the test run, monitor the machine for any irregularities, such as misaligned cuts, uneven glue application, or pressing force issues. If any issues are detected, make further adjustments before running the full production batch.
-
Inspect the Test Piece:
- After the test piece is processed, inspect it thoroughly for any defects, such as insufficient glue squeeze-out, stepped joints, or misaligned timber. Make any necessary adjustments based on the test piece results.
Step 6: Resuming Full Production
Once the test run confirms that the size changes are correctly applied, you can resume full production with confidence.
-
Remove Lockout/Tagout Devices:
- Once the adjustments are complete, remove your lock and tag from the power source and re-energize the machinery following standard procedures.
-
Monitor Initial Runs:
- During the first few runs of the new size, carefully monitor the process to ensure that the adjustments continue to perform as expected. Look for any signs of misalignment or improper pressing and make adjustments as needed.
Step 7: Handling Common Issues During Size Changes
It’s important to be aware of common issues that may arise during size changes and how to address them efficiently:
-
Misaligned Cutter Heads:
- If the cutter heads are not properly aligned after the size change, it may result in uneven cuts or incorrect finger joints. Check the alignment of the cutter heads and make necessary adjustments.
-
Uneven Glue Application:
- If the glue is not being applied evenly, this could weaken the bond between the timber pieces. Inspect the glue applicator and ensure it is calibrated correctly for the new timber size.
-
Warping or Misalignment on the Laminate Deck:
- If laminates are not drying evenly, check the spacing and airflow on the deck. Adjust the spacing and alignment to improve airflow and prevent warping.
Conclusion
Performing size changes at the Finger Jointer Workstation requires careful attention to detail and adherence to safety protocols. By following the steps outlined in this lesson, you will ensure that the machinery is correctly adjusted for new timber sizes, resulting in high-quality, defect-free laminates. Remember to perform test runs and inspect the product thoroughly before resuming full production. Monitoring the machinery during the initial runs will help catch any issues early, allowing for quick adjustments.
In the next lessons, we will cover advanced troubleshooting techniques and how to manage quality control at every stage of production.
Time Required:
Approximately 30-45 minutes

Setup - Gather Tools
Before beginning the size change process, ensure you have gathered all the necessary tools and components:
- New applicator head: Depending on the required laminate width, choose either the 70mm or 90mm applicator head.
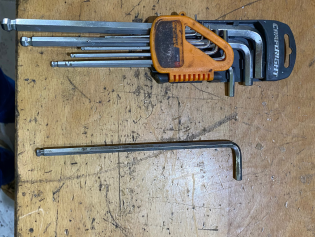
- Allen keys: These will be required to loosen and tighten various bolts during the changeover process.
- Drill: Required for adjusting the laminate array height.
- Extension lead: Used to provide power to the drill for height adjustments.
Having all tools readily available will ensure the process is completed efficiently and without interruptions.

Prepare the Glue Bench
Before proceeding with the size change, the glue bench needs to be prepared. This will be your workspace for switching out the applicator head.
-
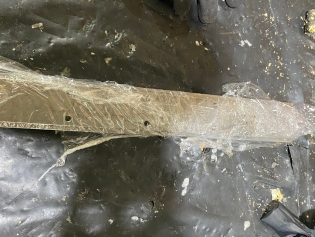
- Place a clean rag on the glue bench to keep the work area free of debris.
- Set the new applicator head on the glue bench, ready for installation.

Turn Off the Glue System
- Turn off the glue applicator via the HMI control panel.
- Turn off the “Empty Round” function to stop the auto-purge process and ensure the glue system is fully off.

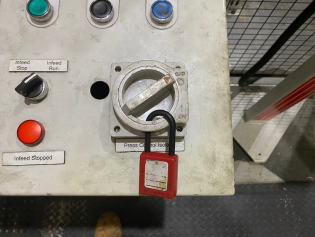
Isolation
To ensure safety during the size change process, you must isolate the rotary press before performing any work on the machinery:
- Apply your lockout tag to the press, ensuring that no one can start the machine while you are working. This is a crucial safety step to prevent accidental startup and potential injury.

Remove the Glue Applicator Head
Follow these detailed steps to remove the current applicator head:
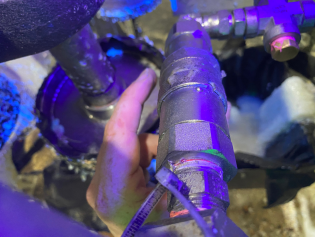
Disconnect the glue hose fitting
Your content goes here. Edit or remove this text inline or in the module Content settings. You can also style every aspect of this content in the module Design settings and even apply custom CSS to this text in the module Advanced settings.
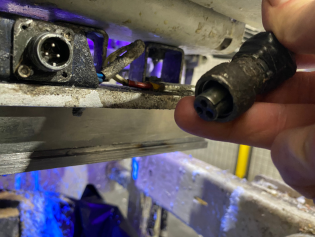
Disconnect the black connector
- Unscrew the lead from the back of the applicator by turning it anticlockwise until it unlocks.
- Pull out the connection.
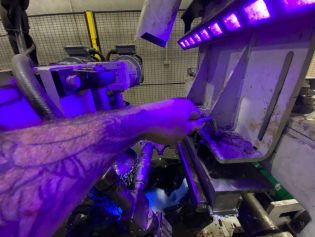
Remove the Applicator Assembly
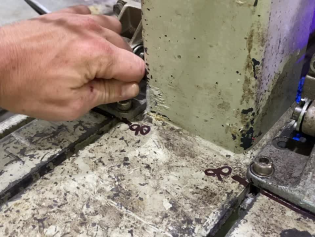
- Use an Allen key to unscrew the four large bolts on the top of the applicator.
- Lift the applicator off the press and place it on the glue bench for further disassembly.
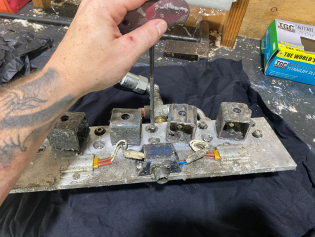
Disassemble the Applicator Head
- Unscrew the eight smaller screws on top of the applicator head using an Allen key.
- If the applicator head is difficult to remove, use a rubber mallet to gently tap and loosen it.
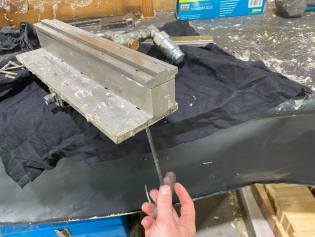
Attach the new Applicator Head
- Position the new applicator head on top of the applicator, ensuring that the holes align with the correct end.
- Secure the applicator head by first screwing in the bottom right screw from underneath, then rotate the applicator and secure the top left screw.
- Flip the applicator over and insert the remaining screws to secure the head in place.

Clean and Store the Previous Head
- Place the previous applicator head in the acid bath and set it to “timer” for cleaning

Reattach the Applicator Head
- Place the applicator back on the press and secure it with the four large bolts previously removed.
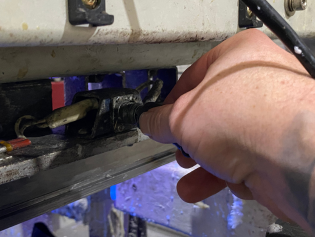
Reconnect the Black Connector
- Ensure that the slot at the bottom of the connector aligns with the groove in the fitting and screw it back in tightly.
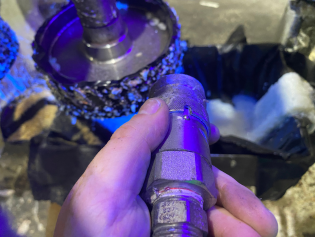
Reconnect the Glue Hose Fitting
- Align the groove on the fitting with the small round metal dot.
- Pull back the sleeve and push the hose firmly onto the fitting until the sleeve clicks into place and can be rotated.

Glue Applicator HMI Settings
Once the new applicator head is in place, update the settings on the HMI (Human-Machine Interface) control panel:
Turn on the glue applicator and initiate the purge function to ensure that the glue is flowing properly and that all holes in the new applicator head are clear.
- Navigate to the workpiece settings.
- Change the setting to the appropriate width for the laminate being processed (either 70mm or 90mm).
This ensures that the glue system is calibrated to dispense the correct amount of adhesive for the new laminate size.


Adjust Infeed Belt Rollers
Next, you will need to adjust the rollers on the infeed belt to match the width of the new laminate size:
- Loosen the three screws on both the front and back rollers using an Allen key.
- Slide the roller forward or backward until it aligns with the pre-marked line corresponding to the new laminate size.
- Tighten the screws to secure the roller in the correct position.
This step ensures that the laminate feeds smoothly into the press.

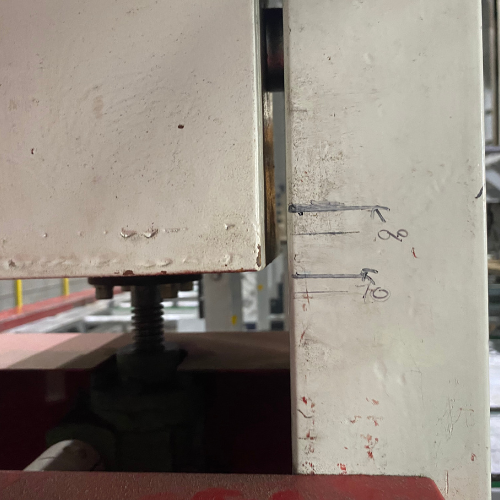
Adjust Laminate Array Height
The final size adjustment involves changing the height of the laminate array:
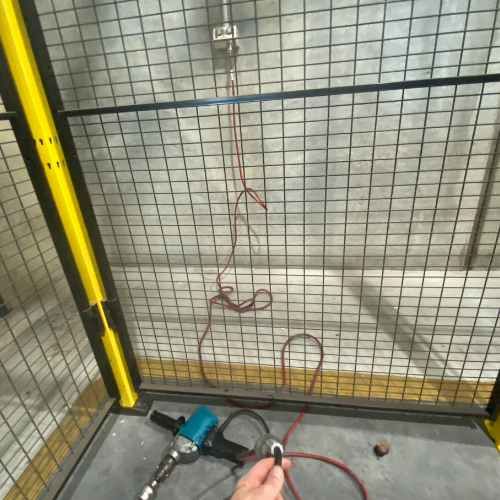
- Plug in the drill using the extension lead at the power point located outside the isolation fencing.
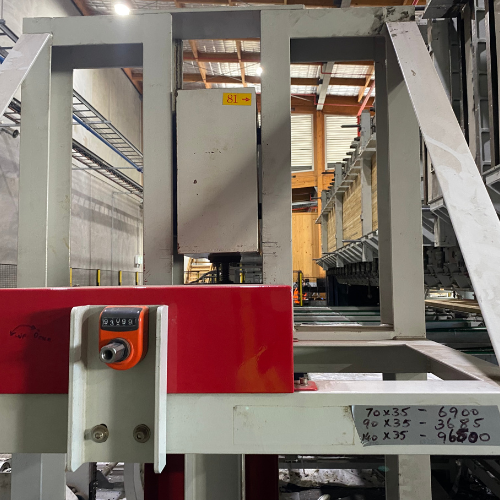
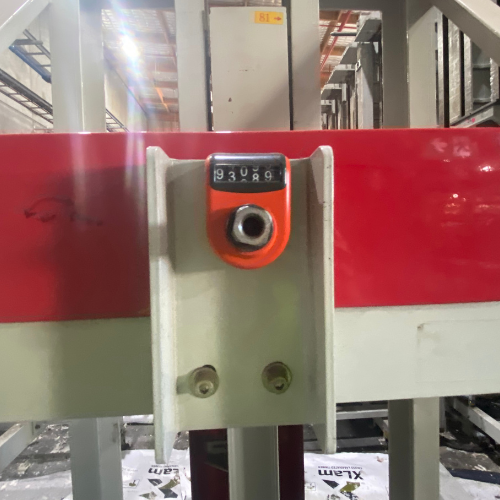
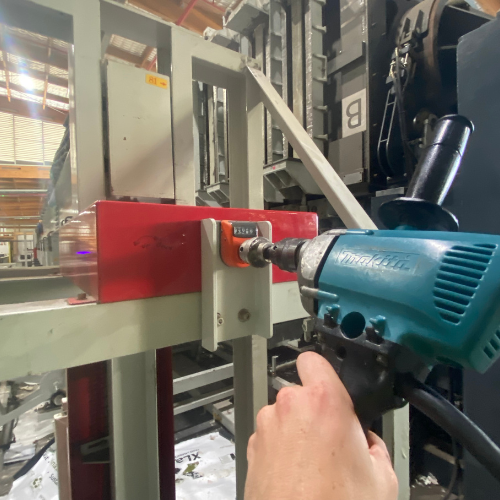
- Position the drill head over the lug at the end of the press array.
- Use the drill to adjust the height until it aligns with the pre-marked line on the metal for the new laminate size.
- Unplug the drill and return it to its storage location.

Perform a Glue Test

Well Done!
- By following these detailed steps, you will successfully complete the size change on the rotary press, ensuring that it is properly configured for the next production run. Always double-check all adjustments before resuming operation to maintain safety and production quality.

